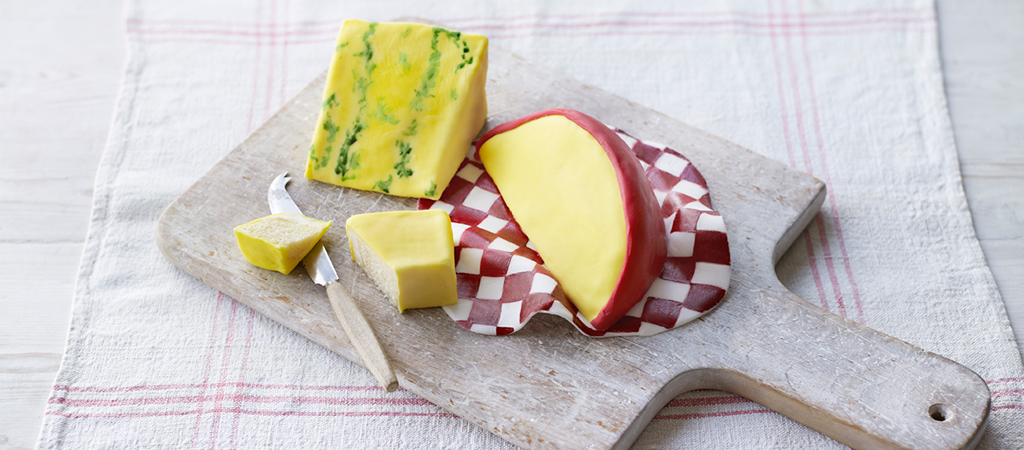
Is it a cake or is it a cheese course? Lemony buttermilk sponge creates the illusion in this clever treat. You’ll have lots of sponge trimmings left over – sandwich them with jam to enjoy with a cup of tea, or freeze them and use them in a trifle another time.

David
Series 10
Serves:
12
Difficulty:
Needs skill
Hands-On Time:
1 hr
Baking Time:
45 mins
- Ingredients
- Method
Print recipe
Method
Step 1
Heat the oven to 180°C/160°C fan/350°F/Gas 4.
Step 2
Make the sponges. Beat the butter, sugar and lemon flavouring or zest together in the bowl of a stand mixer fitted with the beater, on medium speed for about 5 minutes, until pale and fluffy. Gradually add the beaten eggs, mixing well between each addition.
Step 3
Mix the flour, bicarbonate of soda, baking powder and pinch of salt together in a bowl, and in a separate bowl mix together the buttermilk and lemon juice.
Step 4
Using a wooden spoon, alternately add the flour mixture and buttermilk mixture to the creamed butter and sugar, until fully combined. Spoon the sponge batter into the prepared cake tins, filling each about three quarters full. Bake for 40–45 minutes, or until a skewer inserted into the centres comes out clean. Leave to cool in the tins for 10 minutes, then turn out onto a wire rack to cool completely.
Step 5
Cut a 6cm chunk off the length of the loaf-shaped sponge and trim off the crust to make a neat rectangle (this will become the Cheddar cheese). Cut the remaining loaf-tin sponge diagonally to make a wedge (this will become the blue cheese).
Step 6
Cut a wedge from the hemisphere sponge, using about one third of the whole (this will become the Edam cheese). Reserve all the trimmings as treats or for another time.
Step 7
Make the buttercream. Beat the butter and vanilla in the bowl of a stand mixer fitted with the beater, on medium speed for 3–5 minutes, until light and creamy. Add icing the sugar and cream and mix, slowly, until smooth. Coat the top and sides of each shaped sponge in the buttercream and place in the fridge to chill.
Step 8
For the decoration, cut off 350g of the sugar paste and colour it a pale, cheese-like yellow. Lightly dust a work surface and roll out the yellow sugar paste to a thin circle.
Step 9
Remove the sponges from the fridge and wrap each shape in the rolled sugar paste, smoothing the edges for a neat finish. Set aside.
Step 10
Colour 50g of the remaining sugar paste red, like the colour of the wax rind of an Edam cheese. Roll it out into a strip and wrap it around the side of the curved wedge, then trim to neaten.
Step 11
For the blue cheese, using the cake-decorating paintbrush and the blue food-colouring paste, paint the blue-cheese-shaped wedge with dots and lines to resemble the blue veins (dilute the colouring with a little water, if necessary).
Step 12
Roll out the remaining 100g of sugar paste very thinly and form it into a rough circle. Using the red-food coloring paste (again, diluted if necessary), paint on a checked pattern to resemble a cloth. Drape this onto a cake board (or a cheese board), if using, and arrange the cheeses on top. Serve with a cheese knife alongside to complete the illusion, if you like.