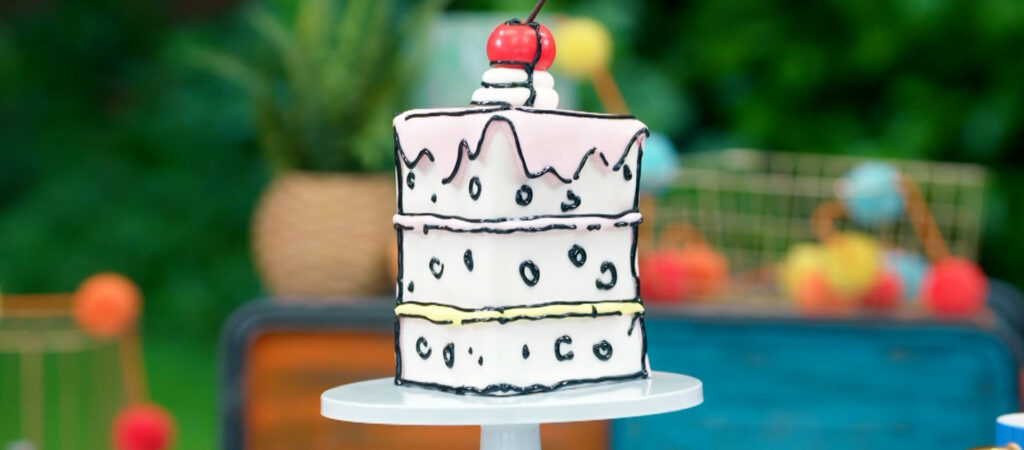
Liam’s cartoon cake looks like it’s come straight out of a comic book. Consisting of layers of peanut butter flavoured sponge, sandwiched with a dark chocolate ganache filling, it is cleverly decorated to look like a two-dimensional slice of cake.

Liam Charles
Junior Bake Off
Makes:
1 cake
Difficulty:
Needs skill
Hands-On Time:
35 mins
Baking Time:
20-25 mins
- Ingredients
- Method
Print recipe
Method
Step 1
Preheat oven to 190°C/170°C fan/375°F/Gas 5.
Step 2
For the peanut butter sponge, in a stand mixer fitted with a paddle attachment or a large bowl with a hand whisk, beat together all the ingredients until smooth.
Step 3
Spoon the mixture into the prepared tin and level with a palette knife.
Step 4
Bake for 20-25 minutes, until the cake is lightly golden and springy to the touch.
Step 5
Remove from the oven and leave to cool in the tin for 5 minutes. Once cool, turn out the cake onto a wire cooling rack and leave to cool completely.
Step 6
Meanwhile, for the dark chocolate ganache, put the dark chocolate into a medium size heatproof bowl. Heat the cream, sugar, butter, and sea salt to a gentle simmer over a medium heat and pour over the dark chocolate. Leave for 2 minutes before stirring until smooth and glossy. Leave to cool until thickened.
Step 7
For the royal icing, mix the egg white with the icing sugar in a large bowl. Add a few drops of black food colouring and stir until fully incorporated. Spoon the icing into a piping bag fitted with the number 3 writing nozzle. Set aside.
Step 8
To assemble, divide the sponge into quarters. Stack the quarters on top of one another and using a serrated knife, trim slightly to create cake wedge shape.
Step 9
Sandwich each layer of your cake wedge with a generous spoonful of the ganache, using an offset palette knife to spread it evenly to the edges.
Step 10
Spread the ganache around the sides of the cake wedge and over the top in an even layer. Smooth the sides and edges, then chill to firm up.
Step 11
On a surface lightly dusted with cornflour, roll the white fondant into a rectangle, approximately 25 x 12cm.
Step 12
Roll the pastel pink fondant into a rectangle, roughly 5mm thick.
Step 13
Wrap the white fondant around the two straight sides of the cake wedge, smoothing with your hands. Trim the excess.
Step 14
Place the rectangle of pastel pink fondant over the curved edge an the top of the slice, smoothing with your hands. Use the picture above to help you with this.
Step 15
Trim the sides of the curved edge where the pink fondant meets the white fondant, then carefully cut a wobbly line along the pink fondant to create a drink effect along the top.
Step 16
Gently score lines around each cake wedge to mark where the “fillings” will go using a fondant tool or the end of a paint brush.
Step 17
Roll the offcuts of pink fondant into a thin sausage, long enough to wrap around the two straight edges of the cake. Repeat with the yellow fondant.
Step 18
Using a little water and the paint brush, stick the pink sausage and the yellow sausage of fondant onto the slice. Don’t worry if the sausages are a little wobbly as these are the “jam” and “buttercream” fillings!
Step 19
Shape the red fondant to look like a large cherry.
Step 20
Roll the remaining white fondant into a sausage, approximately 1cm in thickness, and curl it around to look like a swirl of buttercream.
Step 21
Place the swirl of buttercream on top of the cake wedge, securing with a little edible glue. Put a small dot of edible glue on top of the swirl and top with a cherry.
Step 22
Roll the small piece of modelling chocolate or brown fondant into a thin ‘cherry stalk’, then using a cocktail stick to create a hole, poke into the cherry.
Step 23
Choose a frontside of the cake wedge and from your viewpoint in that position, use the black royal icing to pipe an outline along every edge of the cake wedge, including all the decorative details. Pipe circles between the fillings to look like bubbles in the sponge.