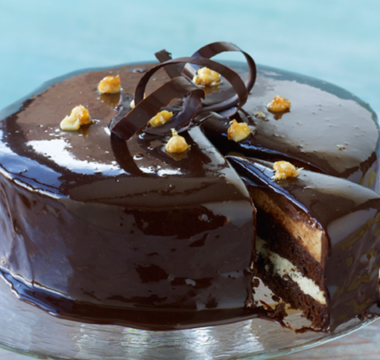
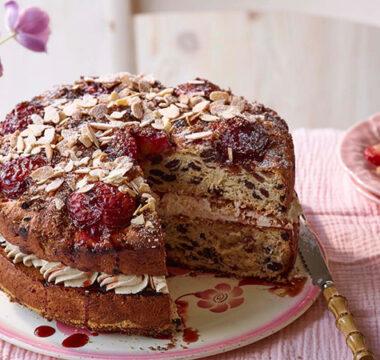
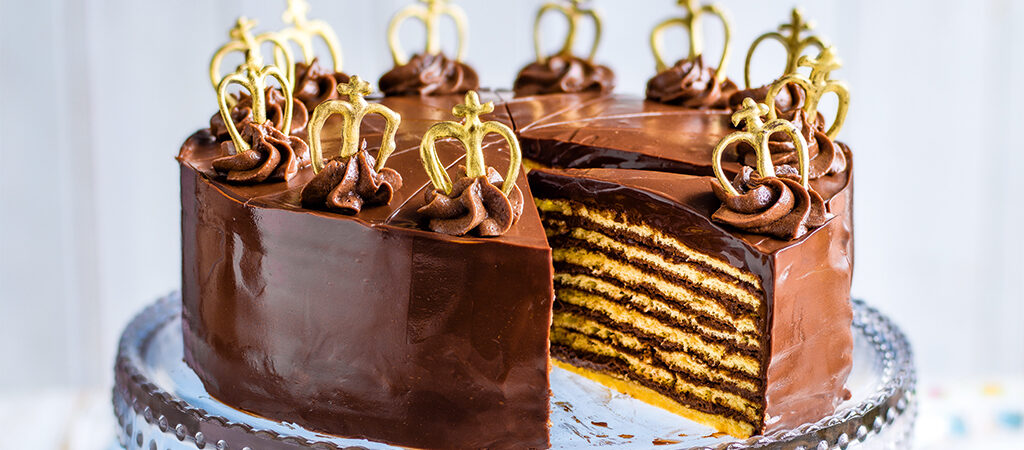
Created to celebrate Prince Regent Luitpold, born in March 1821 and who reigned from 1886–1912, this traditional Bavarian cake is made up of eight layers of sponge, symbolising the eight administrative districts of Bavaria that existed at the time.

Prue Leith
Series 12
Serves:
12
Difficulty:
Challenging
Hands-On Time:
2 hrs, plus chilling
Baking Time:
24 mins
- Ingredients
- Method
Print recipe
Method
Step 1
Make the sponge. Heat the oven to 190°C/170°C fan/Gas 5 and evenly space three shelves in the oven. Using the base of a 25cm round cake tin or dinner plate as a guide, draw a 25cm-diameter circle on eight sheets of baking paper (the same size as your baking sheets). Turn the sheets of baking paper over so the pencil or pen is underneath and use three of them to line the three baking sheets.
Step 2
Whisk the egg whites and salt in a stand mixer fitted with the whisk until firm but not dry, then gradually whisk in half (90g) of the caster sugar and all the vanilla sugar until you have a firm meringue. Spoon the meringue into a clean bowl and set aside.
Step 3
In the same mixer bowl (no need to wash it), whisk the egg yolks with the remaining 90g of caster sugar until thick, pale and mousse-like, and the mixture leaves a ribbon trail when you lift the whisk.
Step 4
Remove the bowl from the stand mixer and gently fold the egg whites into the yolk mixture, using a large metal spoon. Sift the flour and bicarbonate of soda over the egg mixture and fold them in, being careful not to knock the air out of the mixture. Finally, pour the melted butter down the inside of the bowl and fold it in.
Step 5
Divide the mixture into eight portions and spoon one portion onto one of the lined baking sheets in the centre of the circle. Using a palette knife, spread the mixture thinly and neatly up to the edge of the circle. Repeat with two more quantities to make three circles of cake mixture. Bake for 6–8 minutes, until the sponge is golden and springy to the touch. Remove the sponges from the oven and transfer to wire racks to cool.
Step 6
Continue baking in batches until you have eight sponges. Once they are cool, peel off the baking paper and, using the base of the 23cm cake tin as a guide, trim each sponge into a neat 23cm circle.
Step 7
Make the chocolate cream filling. Pour 500ml of the milk into a pan and bring it to just below boiling point. In a large bowl, whisk the egg yolks, cornflour, cocoa powder and remaining 100ml of milk together.
Step 8
Pour the hot milk over the egg mixture, whisking continuously, then pour the mixture back into the pan and whisk it over a gentle heat until the mixture thickens (about 3–5 minutes). Pour the custard into a shallow dish, cover the surface with cling film to prevent a skin forming and leave to cool.
Step 9
Once cool, melt the chocolate in a heatproof bowl set over a pan of barely simmering water, stirring until smooth, then remove the chocolate from the heat and leave it to cool.
Step 10
In a large mixing bowl, beat the butter and icing sugar together until pale and fluffy. Slowly whisk in the cooled custard until thoroughly combined, then add the cooled melted chocolate and whisk until combined.
Step 11
To assemble, place one of the cooled sponges in the base of the lined cake tin. Spoon about one quarter of the chocolate cream filling into a bowl and set aside. Spoon about one seventh of the remaining filling over the top of the sponge in the tin and spread it out evenly. Place the next sponge on top and repeat, layering with the sponges and chocolate cream filling until you have eight sponges and seven layers of chocolate filling. Do not spread any chocolate filling on the top sponge. Chill the cake for 30 minutes.
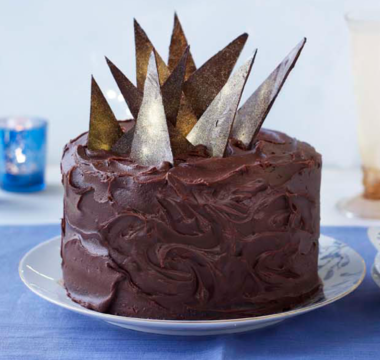
Step 12
Make the chocolate crown decorations, if using. To temper the chocolate, melt 100g of the chocolate in a heatproof bowl set over a pan of barely simmering water until it reaches 44°C on the cooking thermometer. Remove the bowl from the heat and add the remaining 50g chocolate, stirring until the chocolate melts and cools to 32°C.
Step 13
Spoon the chocolate into the small piping bag fitted with a small writing nozzle. Lay your acetate over your crown template and pipe 12 chocolate crown shapes, then set them aside to set.
Step 14
Once the chocolate crowns have set, rub them with gold powder, so that they look gilded. Carefully peel away the crowns to reveal shiny tempered chocolate on the back.
Step 15
Remove the cake from the fridge and turn it out of the tin onto a flat plate or board. With a palette knife and using half of the reserved chocolate cream, spread a thin layer of chocolate cream around the side of the cake to crumb coat, then chill the cake for 20 minutes, until the chocolate cream is firm. Spoon the remaining chocolate cream into the piping bag fitted with a medium closed star nozzle.
Step 16
Make the chocolate ganache. Place the chocolate in a heatproof bowl. Warm the cream in a pan to just below boiling point, then pour it over the chocolate. Leave it to stand for 3 minutes, then stir the chocolate into the cream to form a smooth ganache. Stir in the butter and leave the ganache to cool to a coating consistency (about 32°C).
Step 17
Remove the cake from the fridge and place it on a wire rack. Pour the chocolate ganache over the cake, evenly covering the top and side, then leave the ganache to set for 10–15 minutes.
Step 18
Pipe 12 rosettes around the top edge of the cake, and top each rosette with a gilded chocolate crown, if using. When the ganache is beginning to harden, use a knife to score the top of the ganache to mark out 12 equal portions, ready for slicing.