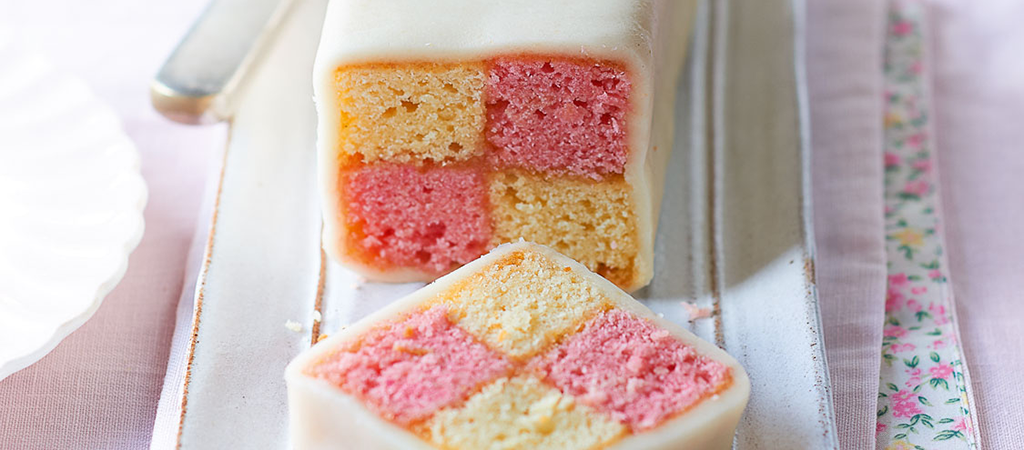
A step up from the free-and-easy Double Marble Cake, the Battenberg uses colouring in a more precise way to make a pretty cake that looks impressive.
- Ingredients
- Method
Method
Step 1
If you are using a special Battenberg tin that comes with dividers to make four strips of sponge, grease and line the tin with butter and baking paper. Alternatively, you can make your own: cut a 20 x 28cm rectangle of parchment-lined foil, set it paper-side up on the worktop and fold it in half along the long length. Open it out, then push the centrefold upwards to make a pleat 4cm high. Crease it firmly, then press the parchment-lined foil sheet with the centre pleat onto the base of greased tin to line it – the pleat will run down the centre of the tin to divide it into two separate sections each 20 × 10cm. Preheat the oven to 180°C/160°C fan/350°F/Gas 4.
Step 2
To make the sponge, put the butter into a mixing bowl or the bowl of a food-mixer and beat until creamy with a wooden spoon or the whisk attachment. Scrape down the sides of the bowl and whisk in the sugar a couple of tablespoons at a time. Scrape down the sides of the bowl where mixture has splattered up, then beat really well for a couple of minutes until the mixture is light and fluffy. Scrape down the sides of the bowl again to get any stray mixture.
Step 3
Break the 2 medium eggs into a separate bowl, add the 2 drops of almond extract and beat with a fork until broken up, then gradually beat into the butter mixture a tablespoon at a time, beating well after each addition. Add a tablespoon of the 100g self-raising flour with each of the last two additions of egg to prevent the mixture from curdling.
Step 4
Sift the remaining flour, a good pinch of salt and 50g ground almonds into the bowl. Add the 2 teaspoons milk and carefully fold everything together with a large metal spoon. Transfer half the mixture (for this cake it’s best to do this by weight, to be really accurate) into a clean bowl. Add the pink or red food colouring a few drops at a time to one portion, mixing it in really well so that it turns pink with no coloured streaks.
Step 5
Spoon the uncoloured cake mixture into two sections of the prepared Battenberg tin or into one side of the prepared square tin (check the pleated divider is still straight and dead centre). Spoon the pink cake mixture into the other two sections of the Battenberg tin or the other section of the prepared square tin. Carefully spread each portion so that the surface is level and the corners are evenly filled.
Step 6
Bake for 20–25 minutes until the sponges are well risen. Check the cake is cooked – it should be springy when gently pressed. Set the tin on a wire rack. Run a round-bladed knife around the inside of the tin to loosen the sponges, then leave to cool until barely warm. Carefully turn out onto the wire rack and peel off the lining paper – the cakes will still be fragile so handle them gently – then leave until cold.
Step 7
To assemble the cake, set the sponges on a chopping board. If you used the square tin to bake two sponges, cut each sponge in half lengthways using a serrated bread knife to make four strips of cake – two pink and two yellow. Trim all the strips so that the short sides are exactly square as they may have risen unevenly.
Step 8
Make sure the worktop is spotlessly clean and crumb-free, then dust it lightly with icing sugar or cornflour. Knead the 350g white marzipan for a minute so that it is supple, then roll it out to a neat 20 x 30cm rectangle.
Step 9
Heat the apricot jam with 1 tablespoon of cold water then push it through a sieve to make a smooth puree. Brush one long side of a pink strip very lightly with jam and set it jam-side down on one short side of the marzipan rectangle, lined up next to the edge. Brush the three other long sides of this piece of cake lightly with jam.
Step 10
Now brush one long side of a yellow cake strip with jam and set it jam-side down onto the marzipan next to the pink strip and touching it. Brush the top of this strip with jam.
Step 11
Set the other yellow strip on top of the pink strip that is in place on the marzipan.
Step 12
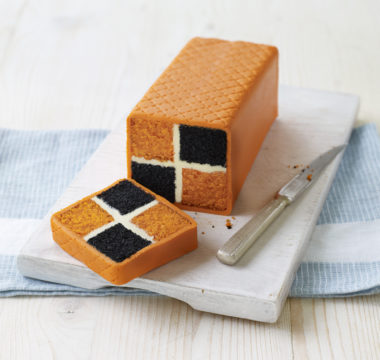
Lightly brush one long side of the second pink strip with jam and set it next to this second yellow strip, so that it sits on top of the yellow strip that’s on the marzipan. You will now have created the familiar checkerboard pattern.
Step 13
To finish the cake, brush the top and long sides of the assembled cake with the apricot jam (gently re-warmed), then roll the cake or wrap the marzipan neatly around and over the cake, leaving the checkerboard ends visible. Press the marzipan join to seal it (it should be along one bottom edge). Gently smooth the marzipan with your hands to neaten it up and press out any air pockets, then trim the ends and crimp the top edges of the marzipan by pinching it gently at regular intervals.
Step 14
Dust lightly with icing sugar just before serving.
Photography: David Munns © Hodder & Stoughton

