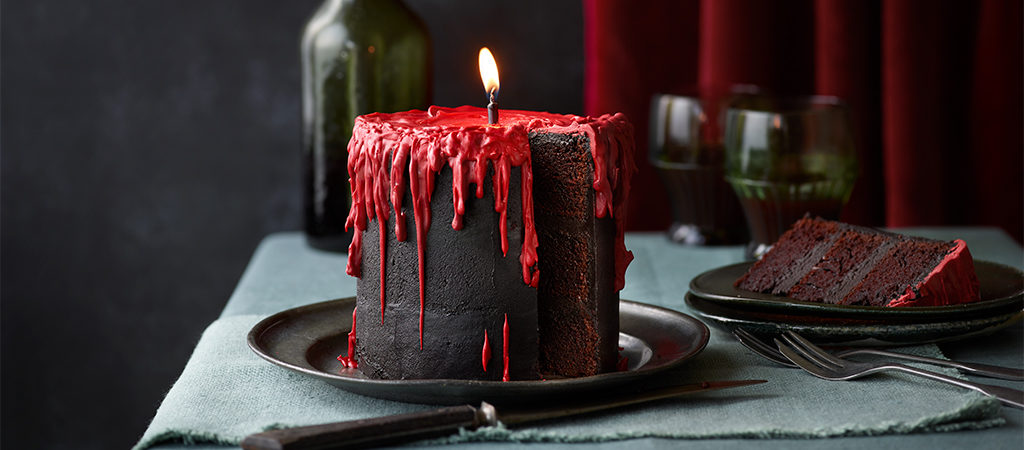
A hauntingly delightful treat! This illusion cake appears to be a waxy candle, melting away, but then reveals a moist chocolate cake coated with a chocolate peanut-butter buttercream in a rich black hue.

Helena
Christmas & New Year Specials
- Ingredients
- Method
Method
Step 1
Heat the oven to 190°C/170°C fan/375°F/Gas 5.
Step 2
Make the sponge. Put the flour, sugar, cocoa powder, bicarbonate of soda, baking powder, and salt into the bowl of stand mixer fitted with a paddle attachment and mix on low speed to combine.
Step 3
Add the buttermilk, oil and vanilla, then add the eggs, one at a time. With mixer still on low, add the coffee and mix until just combined. Scrape the sides and bottom of the bowl with a rubber spatula and mix again for 30 seconds to ensure there are no patches of unmixed flour.
Step 4
Pour the batter into the prepared tin and bake for 35 minutes, until a skewer inserted into the centre comes out clean. Cool in the tin for 30 minutes, then using the 13cm round cutter, trim out three rounds from the sponge. Carefully remove the trimmings and then place the three cake rounds on a cooling rack to cool completely.
Step 5
While the sponges are cooling, make the buttercream. Melt the chocolate in a heatproof bowl set over a pan of simmering water. Stir until fully melted, then set aside until cooled to room temperature.
Step 6
In the bowl of a stand mixer fitted with a beater attachment, beat the butter and peanut butter on medium speed for about 5 minutes, until light and fluffy. Add the egg yolk and vanilla and continue beating for 3 minutes, until combined. Turn the mixer to low and gradually add the sifted icing sugar, then beat at medium speed, scraping down the sides of the bowl as necessary, until smooth and creamy. Add enough of the black food colouring to turn the buttercream a dark grey or black. Do not overmix. (It’s best to decorate immediately.)
Step 7
Spread 2 tablespoons of buttercream evenly over the top of 1 sponge layer. Place a second layer on top, and spread that with 2 tablespoons of buttercream, as before. Top with the remaining layer, turned upside down to give a flat surface, and spread this with a further 2 tablespoons of chocolate buttercream.
Step 8
Using the offset palette knife if you have one (otherwise the flat side of a large knife will do), spread a layer of chocolate buttercream around the outer edge of the stacked cakes to form a crumb coat. Chill for 15 minutes, covering the remaining buttercream with a damp piece of kitchen paper so that it doesn’t dry out.
Step 9
Use the remaining chocolate buttercream to spread an even layer around the sides of the cake. Cover the top of the cake with a little more buttercream to create a flat, smooth surface. Chill for 15 minutes.
Step 10
Melt the candy melts in a heatproof bowl set over a pan of simmering water. Once melted, mix in 1 teaspoon of vegetable oil and enough of the red colouring to create a deep red colour. Spoon half the mixture into the piping bag and reserve the remainder in the bowl.
Step 11
Spoon about 2 tablespoons of the candy-melt mixture on the top of cake, spreading it out using the back of the spoon and pushing the red ‘wax’ out to the edges of the cake, don’t worry if it drips over the side – this is a good thing.
Step 12
Hold the piping bag of red candy melt at top edge of the cake and squeeze out enough so it starts to drip down the sides of the cake, then use the tip of the piping bag to pull down the mixture to create the full effect of waxy drips. Repeat at different lengths all around the cake, then chill for 10 minutes or until the candy melt has set.
Step 13
Mix 2 teaspoons of the remaining vegetable oil into the remaining candy-melt mixture and spoon this into the piping bag. Repeat the same wax-dripping process around the edge of the chilled cake to create the second layer of wax. Allow to set.
Step 14
Using a skewer or cocktail stick, bore a small hole in the centre of the top of the cake and place the candle into the hole, pushing it in until halfway down. Light the candle when you’re ready to serve.
