Can it be a trick and a treat? Bite into these apple illusion cakes for a spiced cinnamon sponge with a surprise apple and maple syrup centre. These individual apple sponges are the perfect pudding for a Halloween party. If you want to make the cakes with children, you can simplify the decorating process by using ready-coloured red or green fondants and skipping the airbrushing and painting steps altogether –the results won’t create as much of an illusion, but they will be just as fun and just as delicious!
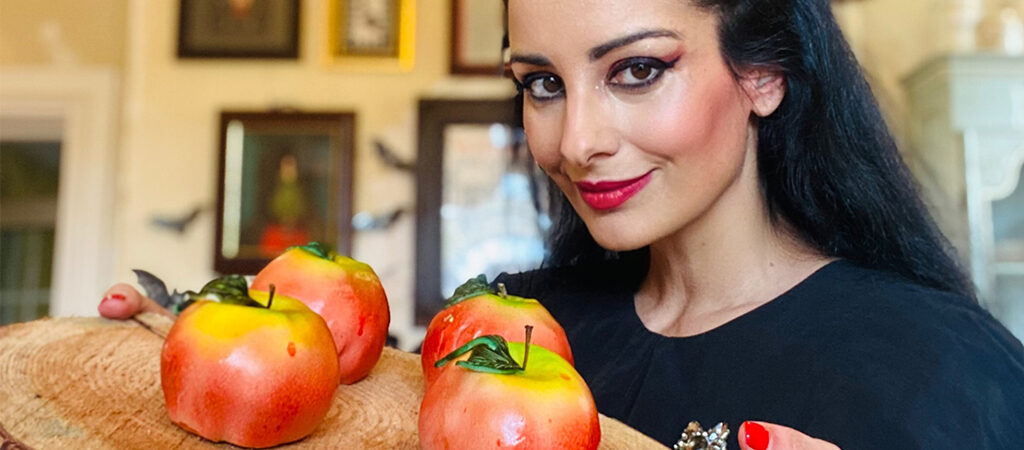

Helena
Series 10
Makes:
6
Difficulty:
Needs skill
Hands-On Time:
1 hr
Baking Time:
35 mins
- Ingredients
- Method
Print recipe
Method
Step 1
Heat the oven to 180°C/160°C fan/350°F/Gas 4.
Step 2
Prepare the apple filling. Melt the butter in a small saucepan set over a medium heat. Add the diced apple and cook for 3–5 minutes, until the apples have softened slightly. Add the maple syrup,
spices and salt, and stir to coat the apple pieces. Leave to cook for a further 5 minutes, until the liquid has evaporated and the apples are glazed. Remove from the heat and set aside.
Step 3
Make the cinnamon sponge. Whisk the oil, sugar and eggs in a stand mixer fitted with the whisk attachment, on medium speed for 3–4 minutes, until light and airy.
Step 4
Sift the flour, ground cinnamon, baking powder and salt together into the bowl with the egg and oil mixture. Using a large metal spoon, fold in the dry ingredients until thoroughly combined.
Step 5
Place the half-sphere moulds on the baking sheet. Spoon the cake batter equally into the 12 holes and bake on the middle shelf for 30–35 minutes, or until a skewer inserted into the centre of the sponges comes out clean. Leave the sponges to cool in the moulds for 10 minutes, then turn them out onto a wire rack, dome upwards, and leave them to cool completely.
Step 6
Meanwhile, prepare the icing. Place the butter and brown sugar in a small saucepan set over a medium heat for about 5 minutes, until the butter and sugar have melted to form a smooth, syrupy consistency. Carefully pour in the milk, stirring continuously –be careful as the mixture may splutter. Bring the syrup to the boil and immediately remove the pan from the heat. Leave the syrup to cool for 10 minutes, then add the icing sugar, a few tablespoons at a time, beating with a wooden spoon between each addition, until all the icing sugar is fully incorporated. Set aside.
Step 7
Level the flat side of each sponge using a serrated knife. Using a melon baller, scoop a hole in the middle of 6 of the sponges and fill the hollow with a spoonful of the apple filling, pressing down to tightly pack it in. Discard the scooped-out pieces of sponge (or eat them –cook’s perks!).
Step 8
Spread a spoonful of the icing onto the flat side of each of the remaining 6 sponges and sandwich them on top of the filled sponges. Smooth the remaining icing around the outside of the ‘apples’.
Step 9
Using the melon baller, carve a small indent in the top of each ‘apple’ where the stem will sit.
Step 10
Cut off a piece of fondant that’s large enough to make 6 apple stems. Using the brown food colouring, colour the fondant for the stems brown. Break off smaller pieces of brown fondant and mould them to shape. (You can use real stems for added authenticity, if you like.)
Step 11
Divide the remaining fondant into 6 equal pieces. Dust the work surface with cornflour and roll each piece into a thin, neat disc, large enough to cover each apple. Carefully transfer 1 fondant disc to each apple, covering the apples neatly and evenly. Using the palms of your hands, smooth the fondant over the top and sides and trim off the excess around the base (gather up the trimmings, as you’ll need them for the next step). Carefully, press your knuckle into the indent at the top of the apple, where the stem will sit.
Step 12
Combine the fondant trimmings into a ball and use the green food colouring to create an even colour. Roll out the green fondant and use this to cut out leaves for the apples. Using a cocktail stick, create veins and markings along the leaves.
Step 13
Decorate the apples. First, using the airbrush (or a kitchen sponge or the cake-decorating paintbrush, if you don’t have an airbrush), paint some yellow food colouring at the top and base of the apple. Top it with some green and then make brush strokes of red, painting upwards from the base to the top of each apple. (Use a real apple for reference.)
Step 14
Dip the bristles of the cake-decorating paint brush in the brown food colouring and flick them towards the apple to create some brown speckles over the apple ‘skin’. Brush some brown around where the stem will go.
Step 15
Using a little water, attach a stem and a leaf to the top of each apple, folding the leaves slightly to give a more realistic look. Leave to set before serving.